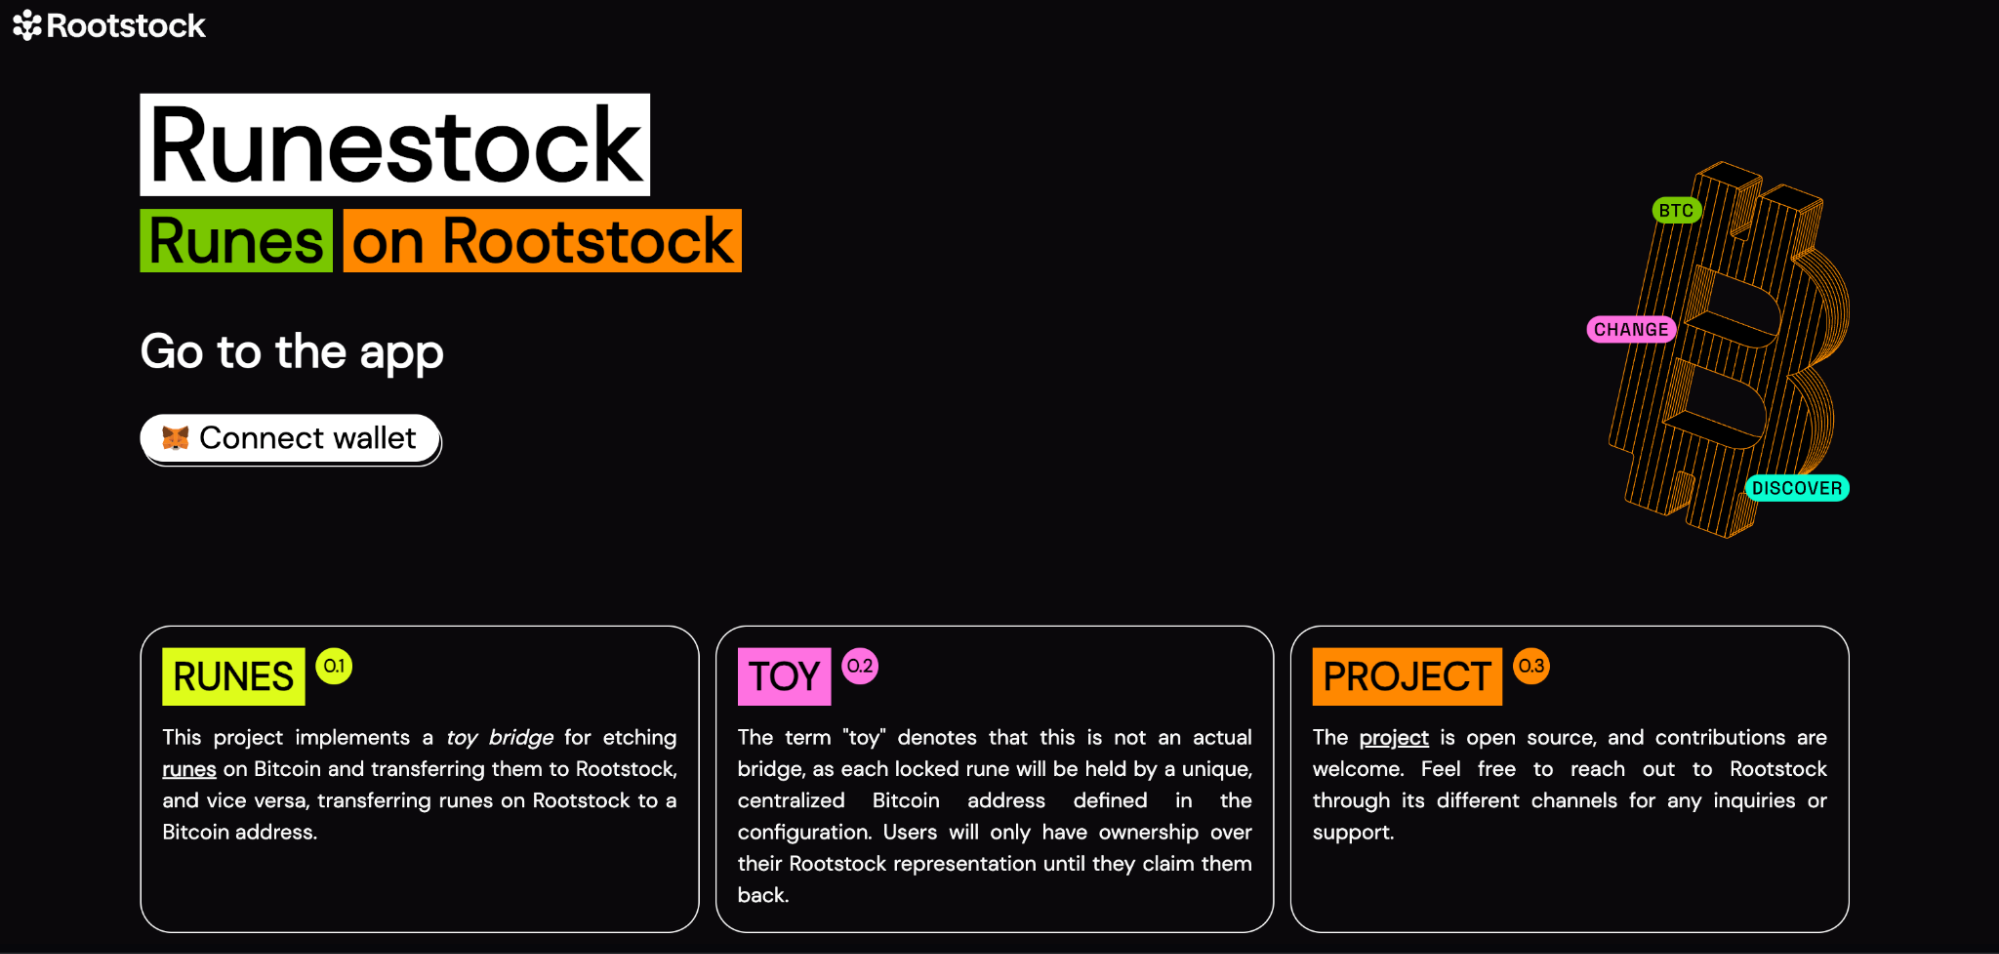
Runes Setup
Prerequisites
Before getting started with the Runes Mock Bridge, ensure you have the following prerequisites in place:
- Familiarity with Remix IDE
You should have a basic understanding of how to use Remix IDE, an online platform for writing, compiling, and deploying Solidity smart contracts. - Knowledge of Solidity
A solid grasp of Solidity, the smart contract programming language, is essential. You'll be writing or interacting with Solidity contracts as part of this process. - MetaMask Wallet Installed and Connected to Rootstock Testnet
Make sure you have MetaMask installed in your browser, and know how to connect it to the Rootstock (RSK) network for managing your transactions. - Rootstock Account
You'll need an account on theRPC API Dashboard. This will allow you to create API keys for interacting with the Rootstock blockchain via RPC. - Local Copy of
bc-runes-jsPackage
Clone thebc-runes-jspackage to your local environment. This package is necessary for generating a Taproot address and Wallet Import Format (WIF) key, which are required for the bridge.
Once these prerequisites are in place, you'll be ready to proceed with setting up and using the Runes Mock Bridge effectively.
Setting Up the .env File for the Runes Mock Bridge
NEXT_PUBLIC_APP_PK='your-private-key'
NEXT_PUBLIC_RPC_URL='your rsk rpc url'
NEXT_PUBLIC_EXPLORER_URL=https://blockstream.info/testnet/tx
NEXT_PUBLIC_RSK_EXPLORER_URL= https://explorer.testnet.rootstock.io/tx
NEXT_PUBLIC_CONTRACT_ADDRESS='your erc1155 contract address'
NEXT_PUBLIC_TAPROOT_ADDRESS='your taproot address'
NEXT_PUBLIC_WIF='your wif key'
To run the Runes Mock Bridge effectively, you'll need to set up the environment variables in a .env file. These variables are crucial for connecting your application to the blockchain network, accessing private keys, and managing other sensitive configurations.
Here's a detailed guide on what each environment variable means, how to get them, and how to set up your .env file correctly.
1. NEXT_PUBLIC_APP_PK='your-private-key'
This is the private key for your application, which is essential for signing transactions or interacting with the blockchain via the Runes Mock Bridge
Please avoid using a wallet that contains real funds for these exercises. Using an empty wallet ensures your funds remain secure and reduces the risk of unintentional loss.
- You can obtain your private key from your wallet. Typically, you will export the private key from the wallet software you're using (like MetaMask or any other supported wallet).
- Follow a detailed tutorial specific to your wallet on how to extract your private key, and then input it here.
2. NEXT_PUBLIC_RPC_URL='your RSK RPC URL'
The Remote Procedure Call (RPC) URL is how your Runes Mock Bridge interacts with the Rootstock (RSK) blockchain.
- To get the RSK RPC URL, go to theRPC API Dashboard and log in. After logging in, you can create an API key that will give you access to the RPC URL.
- Once the key is generated, you can use it to set up this variable, which allows your bridge to communicate with the blockchain.
3. NEXT_PUBLIC_EXPLORER_URL=https://blockstream.info/testnet/tx
This is the URL for the Bitcoin Testnet Explorer provided by Blockstream, where you can track Bitcoin testnet transactions.
This value remains constant and doesn't need to be changed, as it will always point to the Bitcoin testnet explorer.
4. NEXT_PUBLIC_RSK_EXPLORER_URL=https://explorer.testnet.rootstock.io/tx
This is the URL for the Rootstock Testnet Explorer, where you can track transactions related to the Rootstock network.
Like the Blockstream explorer URL, this value is also constant and doesn't need to be changed. It is set to the correct Rootstock testnet explorer.
5. NEXT_PUBLIC_CONTRACT_ADDRESS='your ERC-1155 contract address'
The RuneToken implementation used is not a standard ERC-1155 contract. It includes custom functions to freeze tokens transferred from Rootstock to Bitcoin. To ensure compatibility, please use the same (or an improved) version of the smart contract available in this repository: RuneToken.sol and deploy it.
This variable is used to specify the address of your deployed ERC-1155 contract, which plays a key role in the bridge's functionality.
- You need to deploy your ERC-1155 contract using Remix IDE or a similar tool. Once the deployment is complete, you will get the contract address.
- Copy the contract address from Remix IDE after deployment and paste it into this variable.
6. NEXT_PUBLIC_TAPROOT_ADDRESS='your taproot address'
Taproot addresses are used for Bitcoin transactions with improved privacy and flexibility. The Runes Mock Bridge requires a Taproot address for interacting with Bitcoin's taproot transactions.
- You can generate a Taproot address using a special package we’ve created. Follow these steps:
- Clone the repository from bc-runes-js.
- Run
npm installto install all the required dependencies. - Run
npm run generate-addressto generate the Taproot address.
- Once generated, copy the Taproot address from the output and paste it into this variable.
> bc-runes-js@0.3.2 generate-address
> node src/utils/address.js --log=address

No WIF set, generating new random address
{
  taprootAddress: 'tb1pl9lcxu4f373dpzqzvq5amcm8het2chgwc45yhtlxkz5r66dq2zcqhfvrnx',
  WIF: 'cQwnr3fnmrkEPYNpCnsHqn7opcEwfezKbmadBD8b85XozXQCZyzP'
}
you can generate multiple taproot address
7. NEXT_PUBLIC_WIF='your WIF key'
The Wallet Import Format (WIF) key is the encoded version of your Bitcoin private key, which is necessary for signing Bitcoin transactions on the testnet.
- The same package used to generate the Taproot address will also generate the WIF key.
-
After running
npm run generate, you will get both the Taproot address and the WIF key as part of the output. -
Copy the WIF key and paste it into this variable.
-
Security: Ensure that the .env file is kept private and not exposed in public repositories or shared with unauthorized people. This file contains sensitive information such as your private keys, which could be exploited if leaked.
Testing: If you are using testnets (like Bitcoin or Rootstock testnets), make sure to configure your RPC URL, private keys, and contract addresses to match the appropriate testnet environment. This ensures that you're not interacting with the mainnet during development.
Installation Guide
To clone and run the Runes Mock Bridge project locally, follow these steps:
1. Clone the Repository:
git clone https://github.com/rsksmart/rsk-runes.git
cd rsk-runes
2. Install Dependencies:
Use either yarn or npm to install the necessary dependencies:
yarn
or
npm install
3. Access the Application:
Once the installation is complete, start the development server and access the application in your browser by visiting:
http://localhost:3000
-
Click on "Connect Wallet":
- Locate and click the "Connect Wallet" button. This is typically found in the top right corner of the platform.
-
Select MetaMask:
- From the list of available wallets, select MetaMask.
-
Follow the On-Screen Instructions:
- Once connected, your wallet address will appear on the platform, indicating that your MetaMask wallet is successfully linked.
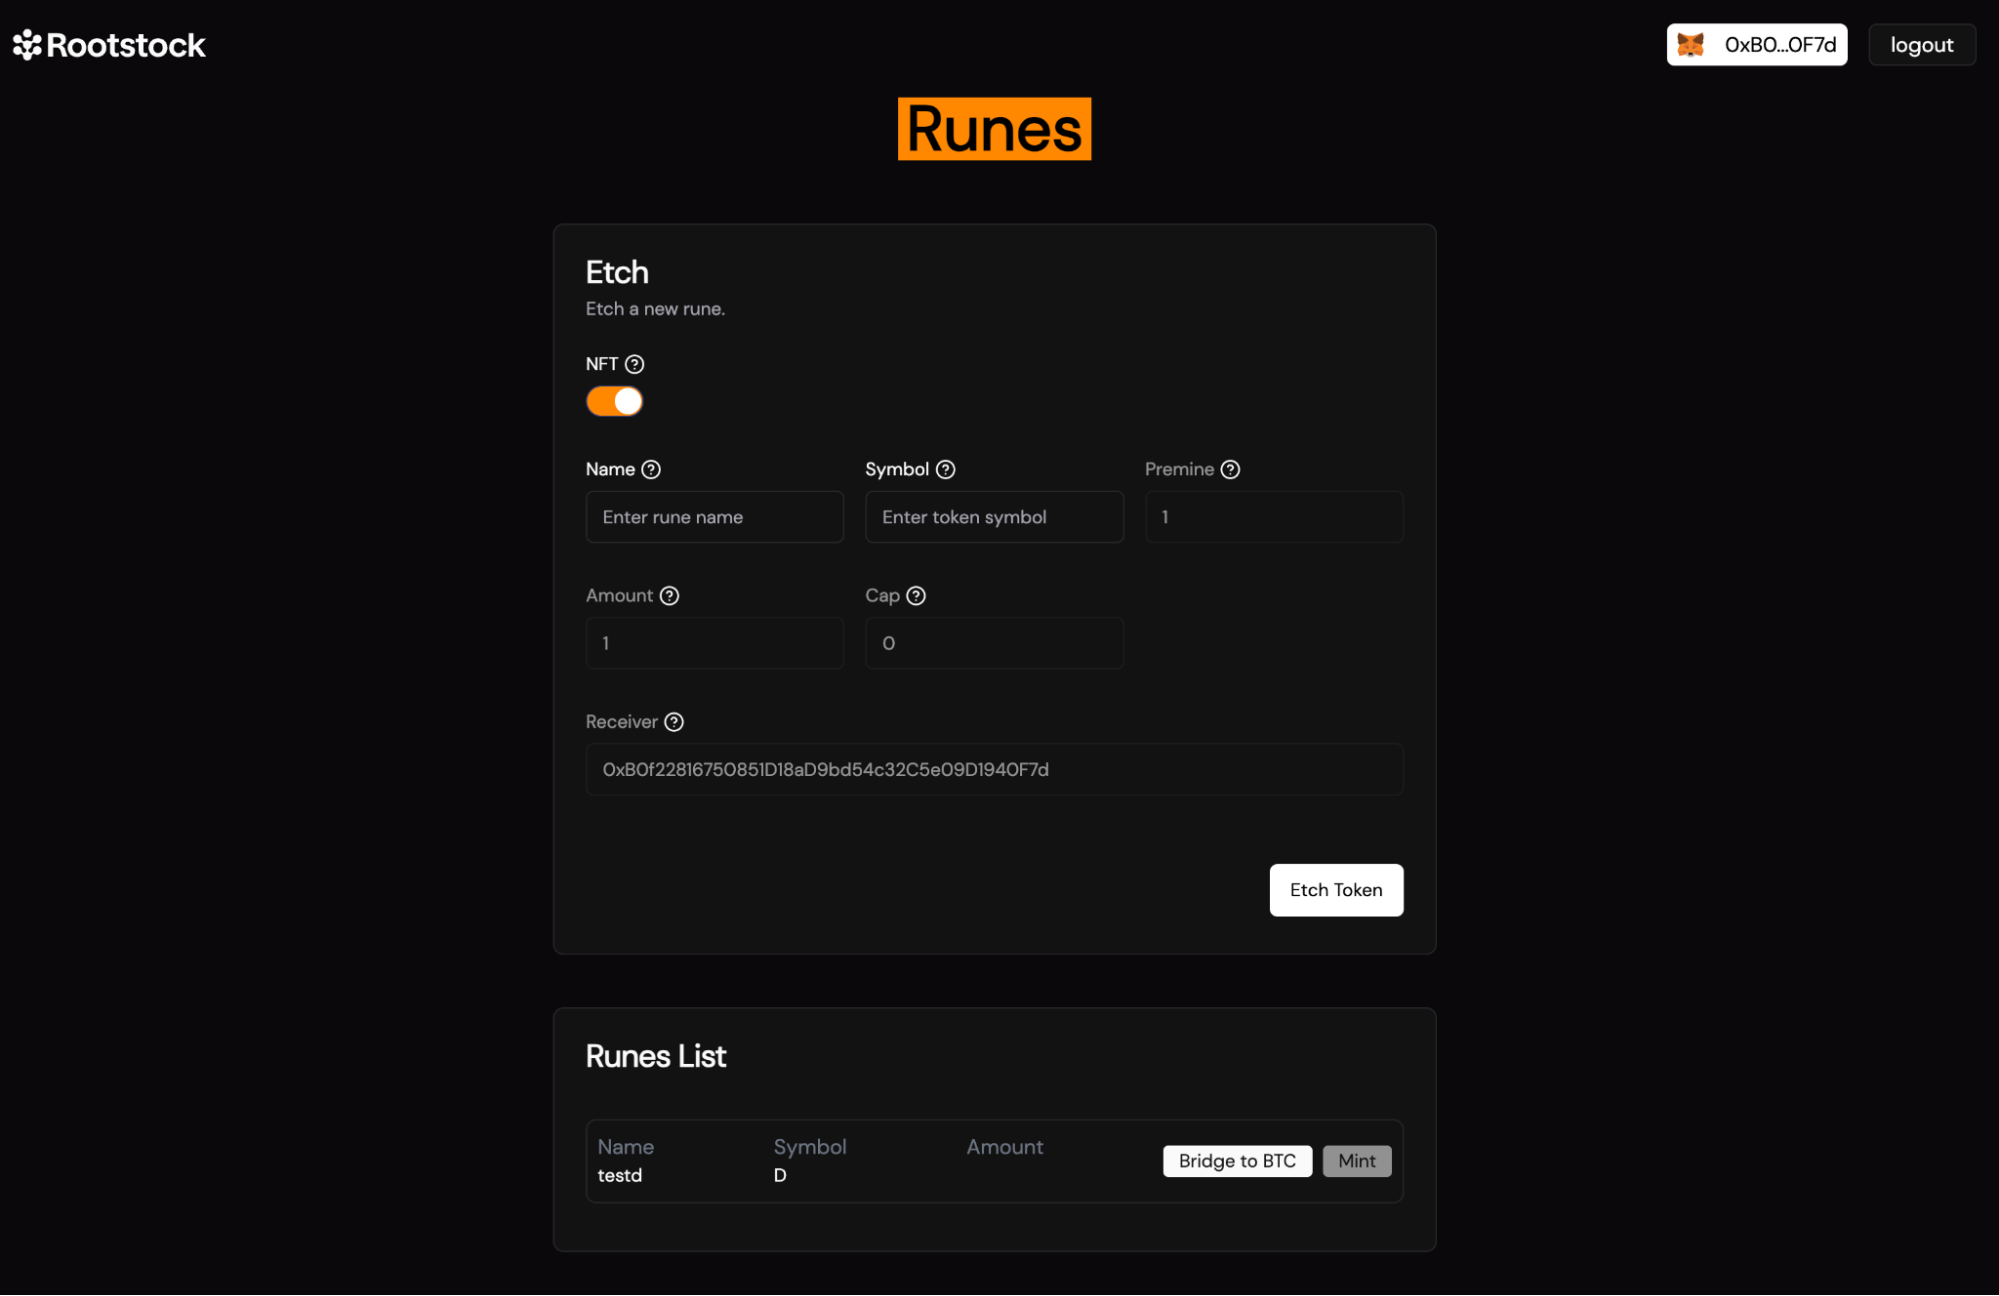
Mint Runes on Rootstock
After logging in, follow the steps below to mint a new rune.
- Check Your MetaMask Wallet:
- At the top right of the screen, you will see your connected MetaMask wallet address (Rootstock network). Ensure it's the correct wallet before proceeding.
- NFT Toggle (Optional):
- If you're minting an NFT, turn on the NFT toggle switch. Otherwise, leave it off to mint a standard token.
- Name:
- Description: Enter the name of your rune, which will serve as its identifier.
- Example: You might name it something like "EventRune."
- Symbol:
- Description: Enter a single character (letter, number, or symbol) as the token symbol.
- Example: Use something simple like "R" or "$."
- Premine:
- Description: This is the amount of runes that will be minted immediately to the rune creator.
- Example: Enter "10" to pre-mine 10 runes directly into your wallet.
- Amount:
- Description: Define the number of runes minted per transaction.
- Example: Enter "1" to mint one rune per transaction.
- Cap:
- Description: The maximum number of runes that can be minted, excluding pre-mined runes.
- Example: Set it to "100" if you want to limit the total rune supply to 100.
- Receiver:
- Description: This will automatically fetch your Rootstock wallet address where the minted runes will be sent.
- Etch Token:
- After filling out all the fields, click the "Etch Token" button to start the minting process.
- Wait for Confirmation:
- Once you've clicked Etch Token, you will see a screen that informs you that your transaction is being processed.
- Example: The screen will show that it is waiting for multiple confirmations (e.g., "Waiting for 7 confirmations"). During this time, the network is validating your transaction.
- You will need to wait until the required number of confirmations is reached before the rune minting process is complete.
- Runes List:
- After the confirmations are completed, your newly minted rune will appear in the Runes List at the bottom of the screen, displaying all the runes you've created.
- Log Out:
- If you're done, click the "Logout" button at the top right of the screen to securely end your session.
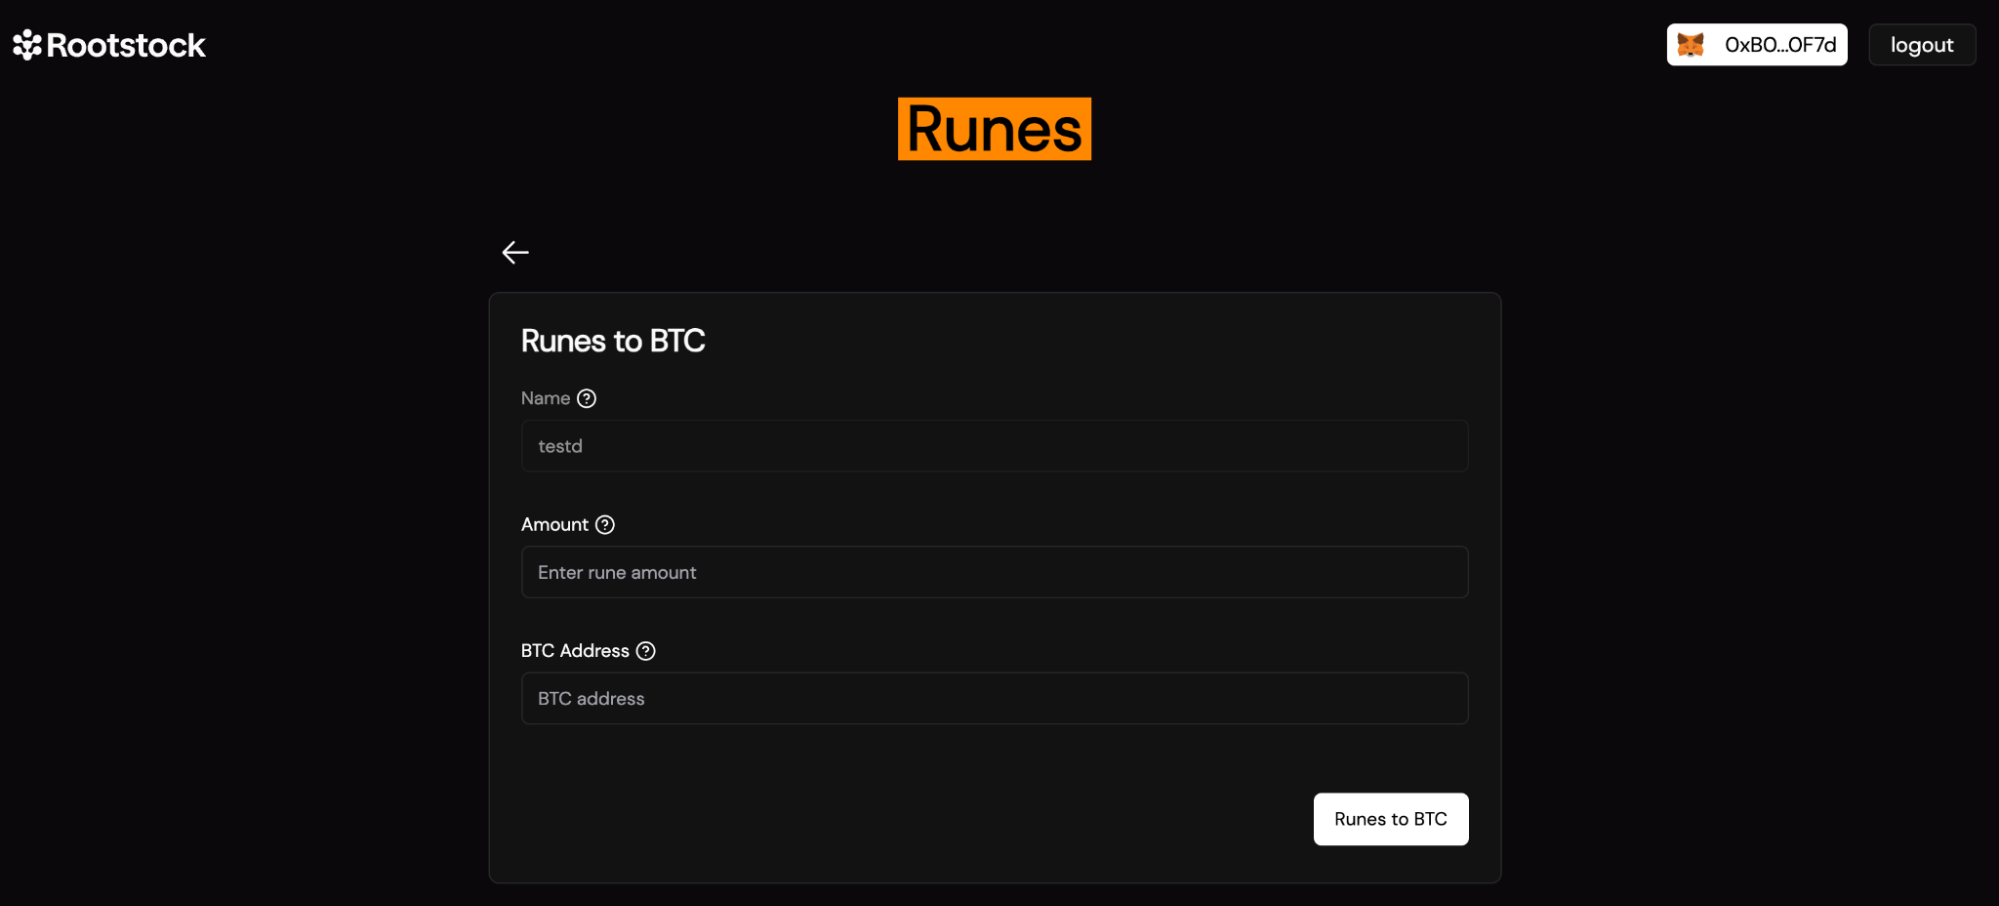
Bridge Runes to BTC
Once you've successfully minted your rune, you can bridge it to BTC. Follow the instructions below.
- Click on the "Bridge" Button:
- After minting your rune (like the one shown in the image above), click on the "Bridge" button next to the rune you want to convert to BTC.
- This will take you to the bridging screen.
- Enter the Required Details:
- On the new screen, you'll be prompted to enter the following information:
- Name:
- Description: Enter the name of the rune you want to bridge. This should match the name of the rune you created earlier.
- Example: If you named your rune "EventRune," enter that as the name.
- Amount:
- Description: Enter the number of runes you want to bridge to BTC.
- Example: If you want to bridge 10 runes, enter "10."
- BTC Address:
- Description: Enter your Bitcoin wallet address where the BTC equivalent will be sent after the rune is bridged.
- Example: Ensure this is a valid BTC wallet address (e.g., "bc1q...").
- Click "Runes to BTC" Button:
- After filling in the details, click on the "Runes to BTC" button to initiate the bridging process.
- The system will process the bridging, and your runes will be converted to BTC and sent to the provided BTC address.