Runes Contract Explanation walk through
1. Understanding the Contract Structure
This contract defines a new token type, RuneToken, based on the ERC-1155 standard. It also uses the Ownable contract, which restricts certain functions to the contract's owner.
Key Imports:
import "@openzeppelin/contracts/token/ERC1155/ERC1155.sol";
import "@openzeppelin/contracts/access/Ownable.sol";
import "@openzeppelin/contracts/utils/Strings.sol";
- ERC1155: This is a token standard that supports both fungible and non-fungible tokens within the same contract.
- Ownable: This contract standard restricts certain actions to only the contract's owner (the one who deployed it or someone assigned as the owner).
- Strings: A utility library for working with string conversions.
Main Components of the Contract
Events:
TokensFrozen: Emits an event when tokens are frozen for a specific account.TokensUnfrozen: Emits an event when tokens are unfrozen.
Data Structures:
- Balance: Holds the account and balance of a token.
- TokenInfo: Contains details about a token, such as its URI ( Uniform Resource Identifier), name, symbol, maximum supply, current supply, default minting amount, and balance.
Mappings:
_tokenInfos: Stores the information about each token, keyed by the token ID._userTokens: Tracks all tokens held by a user._frozenTokens: Keeps track of how many tokens are frozen for each user.
2. The Constructor
constructor(address initialOwner) ERC1155("") Ownable(initialOwner) {}
- ERC1155 (""): This calls the ERC1155 constructor, but the URI is set as an empty string initially.
- Ownable (initialOwner): The
Ownablecontract is initialized with theinitialOwneras the owner of the contract, allowing only this address to perform certain actions (e.g., minting).
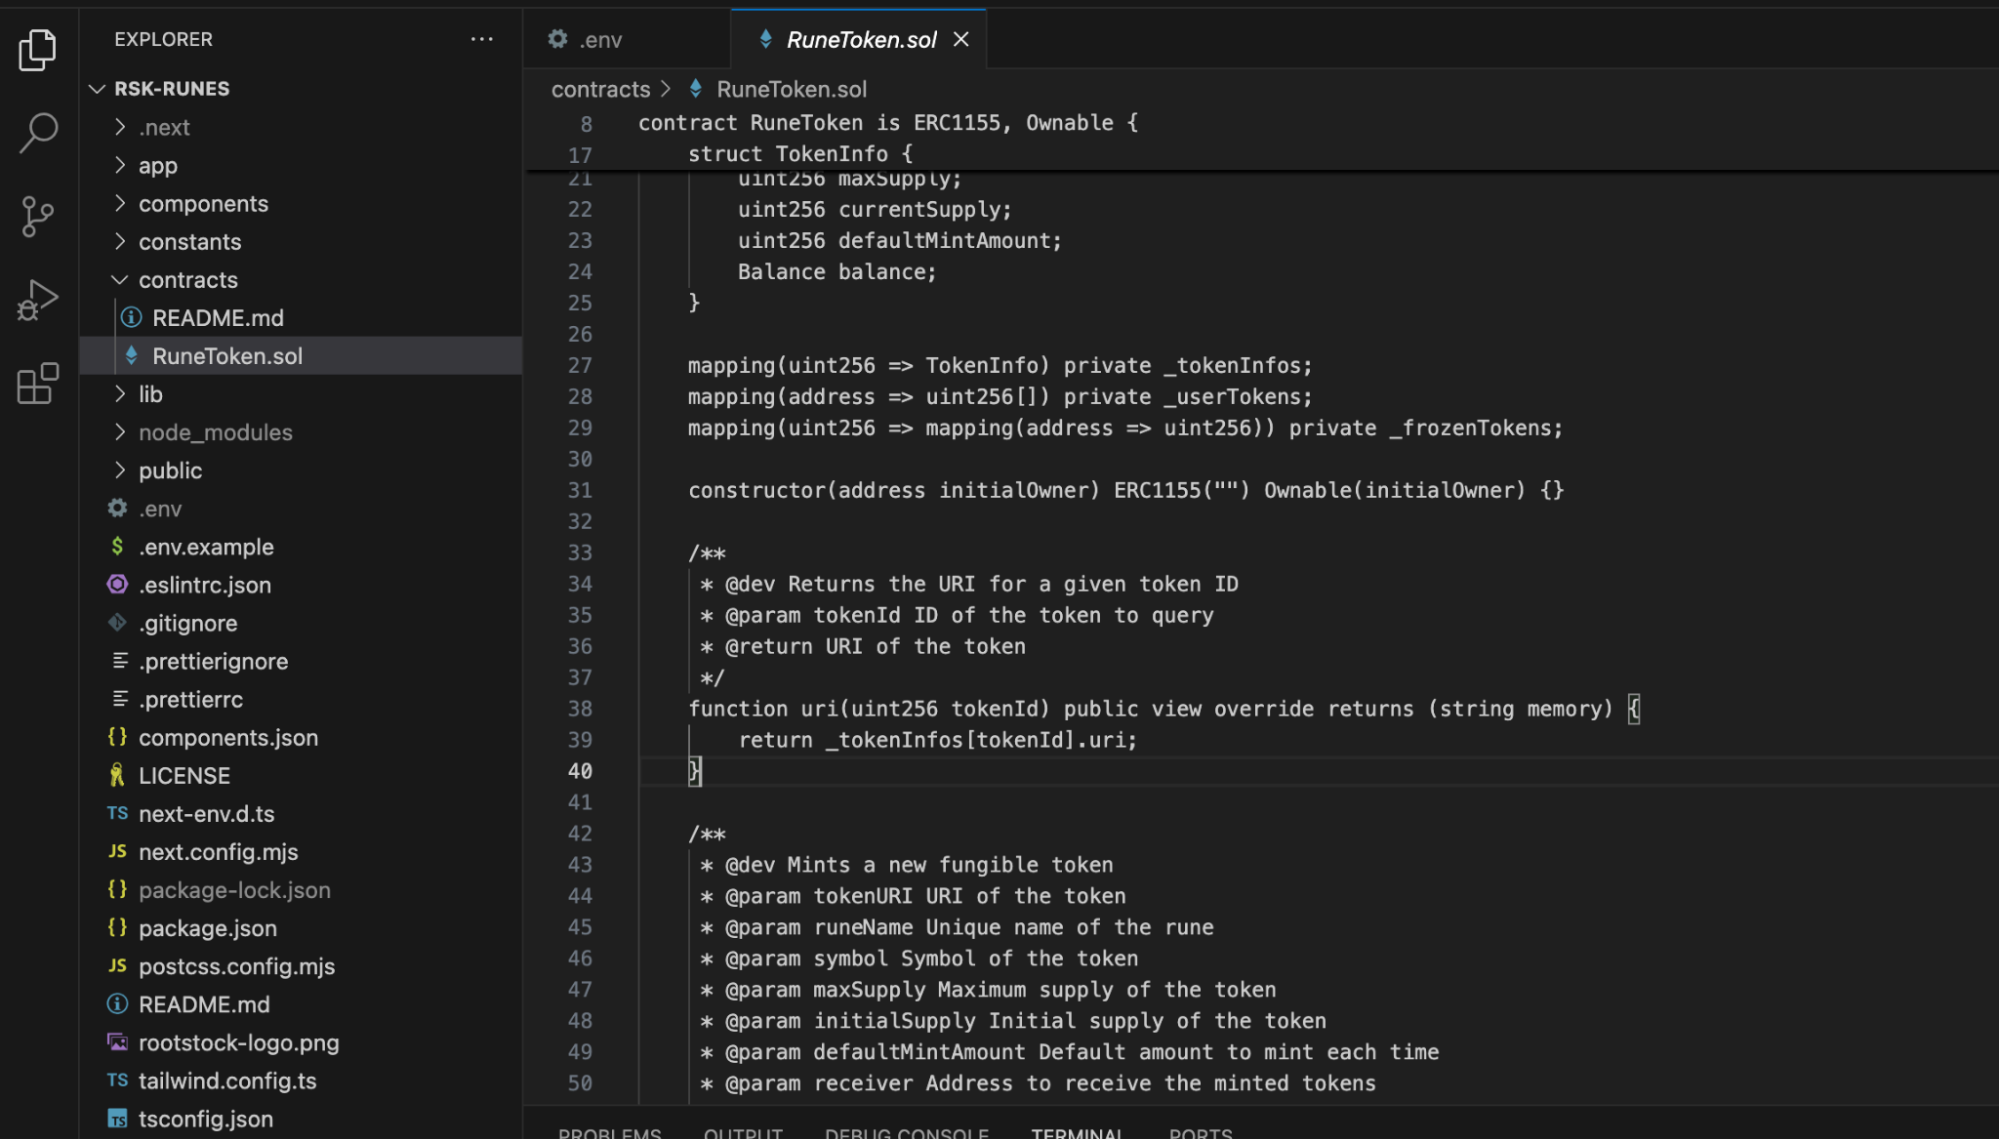
3. The uri Function
function uri(uint256 tokenId) public view override returns (string memory) {
    return _tokenInfos[tokenId].uri;
}
This function returns the URI for a given token ID. The URI typically points to a metadata file that contains additional details about the token (e.g., images, descriptions).
4. Minting Fungible Tokens
function mintFungible(
    string memory tokenURI,
    string memory runeName,
    string memory symbol,
    uint256 maxSupply,
    uint256 initialSupply,
    uint256 defaultMintAmount,
    address receiver
) public onlyOwner {
    // Function logic here
}
This function allows the owner of the contract to mint fungible tokens.
Steps Involved:
- Check max supply: Ensure that the initial supply is not greater than the maximum allowed supply.
- Generate a token ID: A unique token ID is created by hashing the
runeNameusingkeccak256. - Token ID uniqueness check: Ensure that the token ID doesn't already exist.
- Save Token Info: Store details about the token in the
_tokenInfosmapping. - Mint the token: Mint the specified amount (
initialSupply) to thereceiveraddress. - Track ownership: Add the minted token to the user's list of owned tokens using
_addUserToken.
5. Minting Non-Fungible Tokens (NFTs)
function mintNonFungible(
    string memory tokenURI,
    string memory runeName,
    string memory symbol,
    address receiver
) public onlyOwner {
    // Function logic here
}
This function is similar to mintFungible but for minting non-fungible tokens. A non-fungible token is a unique token, meaning only one exists.
Key Differences:
- Max Supply is always
1for non-fungible tokens. - Current Supply is also set to
1.
6. Minting More Tokens
function mintMore(
    string memory runeName,
    address receiver
) external onlyOwner {
    // Function logic here
}
This function allows the contract owner to mint additional tokens of an existing fungible token, as long as the new supply doesn’t exceed the maximum supply.
Key Steps:
- Check token existence: Ensure the token exists by checking its
maxSupply. - Check supply limits: Ensure the current supply plus the new minting amount doesn’t exceed the max supply.
- Mint tokens: Mint more tokens to the
receiver.
7. Token Freezing and Unfreezing
Freezing Tokens:
function freezeTokens(string memory runeName, uint256 amount, address owner) external onlyOwner {
    // Function logic here
}
- Freezing tokens restricts the user from transferring them.
- The function ensures that the account has sufficient tokens to freeze.
- The frozen amount is added to
_frozenTokens.
Unfreezing Tokens:
function unfreezeTokens(string memory runeName, uint256 amount, address owner) external onlyOwner {
    // Function logic here
}
- This function unfreezes the tokens, allowing the user to transfer them again.
- The frozen amount is reduced from
_frozenTokens.
8. Token Information Queries
Get Token Information:
function getTokenInfo(uint256 tokenId, address holder) public view returns (TokenInfo memory) {
    // Function logic here
}
- This function retrieves the details about a token (such as URI, name, symbol, max supply, etc.).
- It can also include the token balance of a specific
holderif theholderaddress is provided.
Get Tokens Owned by a User:
function getUserTokens(address user) public view returns (uint256[] memory) {
    return _userTokens[user];
}
- This function returns a list of all token IDs owned by a specific user.
9. Token Transfer Functions with Freezing Consideration
ERC1155 includes transfer functions (safeTransferFrom and safeBatchTransferFrom). These are overridden in this contract to take into account frozen tokens.
function safeTransferFrom(
    address from,
    address to,
    uint256 id,
    uint256 amount,
    bytes memory data
) public virtual override {
    require(balanceOf(from, id) >= amount + _frozenTokens[id][from], "Insufficient unlocked balance for transfer");
    super.safeTransferFrom(from, to, id, amount, data);
}
This ensures that users cannot transfer frozen tokens. The contract checks that the unlocked balance (total balance minus frozen balance) is sufficient before allowing transfers.
10. Overriding balanceOf to Consider Frozen Tokens
function balanceOf(address account, uint256 tokenId) public view override returns (uint256) {
    uint256 totalBalance = super.balanceOf(account, tokenId);
    uint256 frozenBalance = _frozenTokens[tokenId][account];
    return totalBalance - frozenBalance;
}
This function returns the number of unfrozen tokens owned by a user for a specific token ID.
Smart Contract Deployment
To deploy the Runes smart contract using Remix IDE, follow these steps in detail:
Step 1: Access Remix IDE
- Open your web browser and go to Remix IDE.
Step 2: Create a New File

- In the Remix IDE, navigate to the File Explorer (the first icon on the left sidebar).
- Click on the file icon to create a new file.
- Name the file
RuneToken.sol.
Step 3: Copy and Paste the Smart Contract
- Locate the
RuneToken.solfile from the RSK-RUNES repository under the contracts folder
- Open the
RuneToken.solfile and copy the entire smart contract code. - Paste the copied code into the newly created
RuneToken.solfile in Remix IDE.
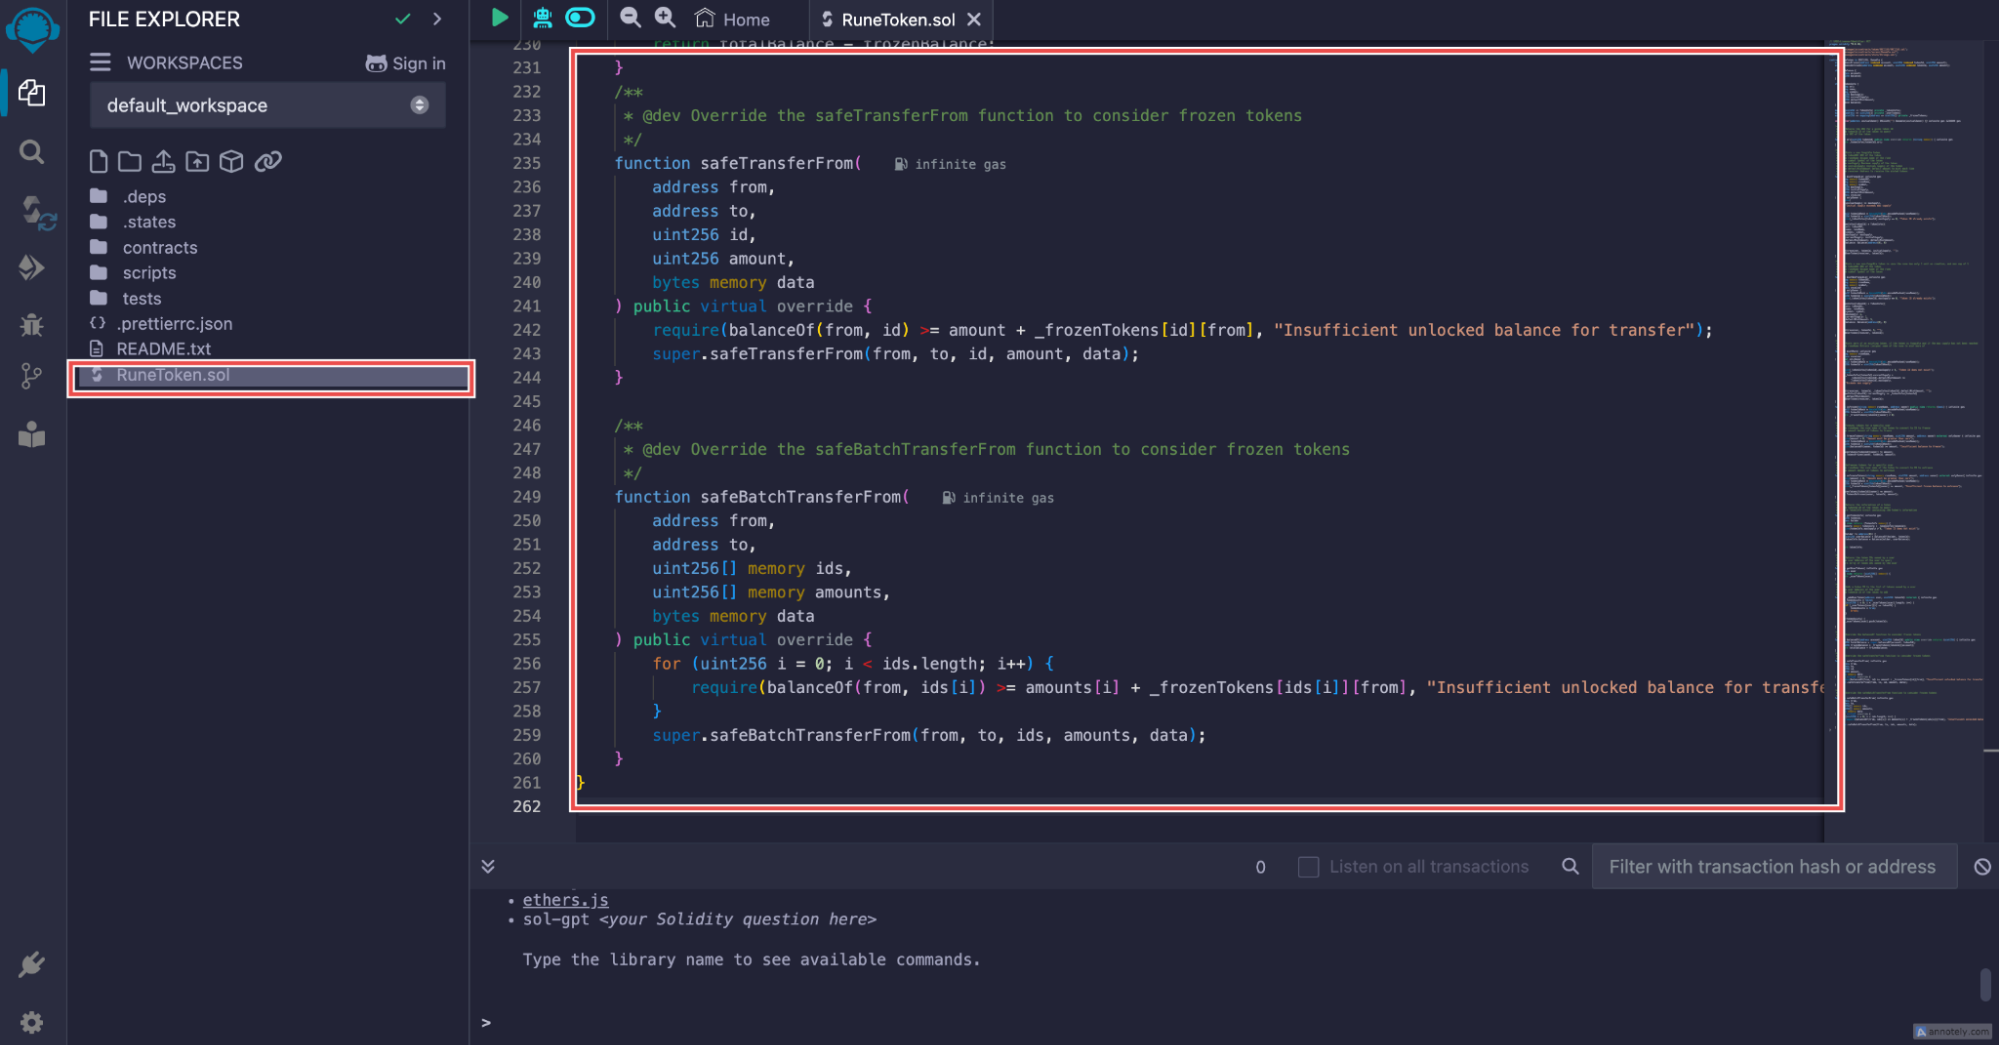
- Click on the Save icon (the disk icon) to save the file.
Step 4: Compile the Smart Contract
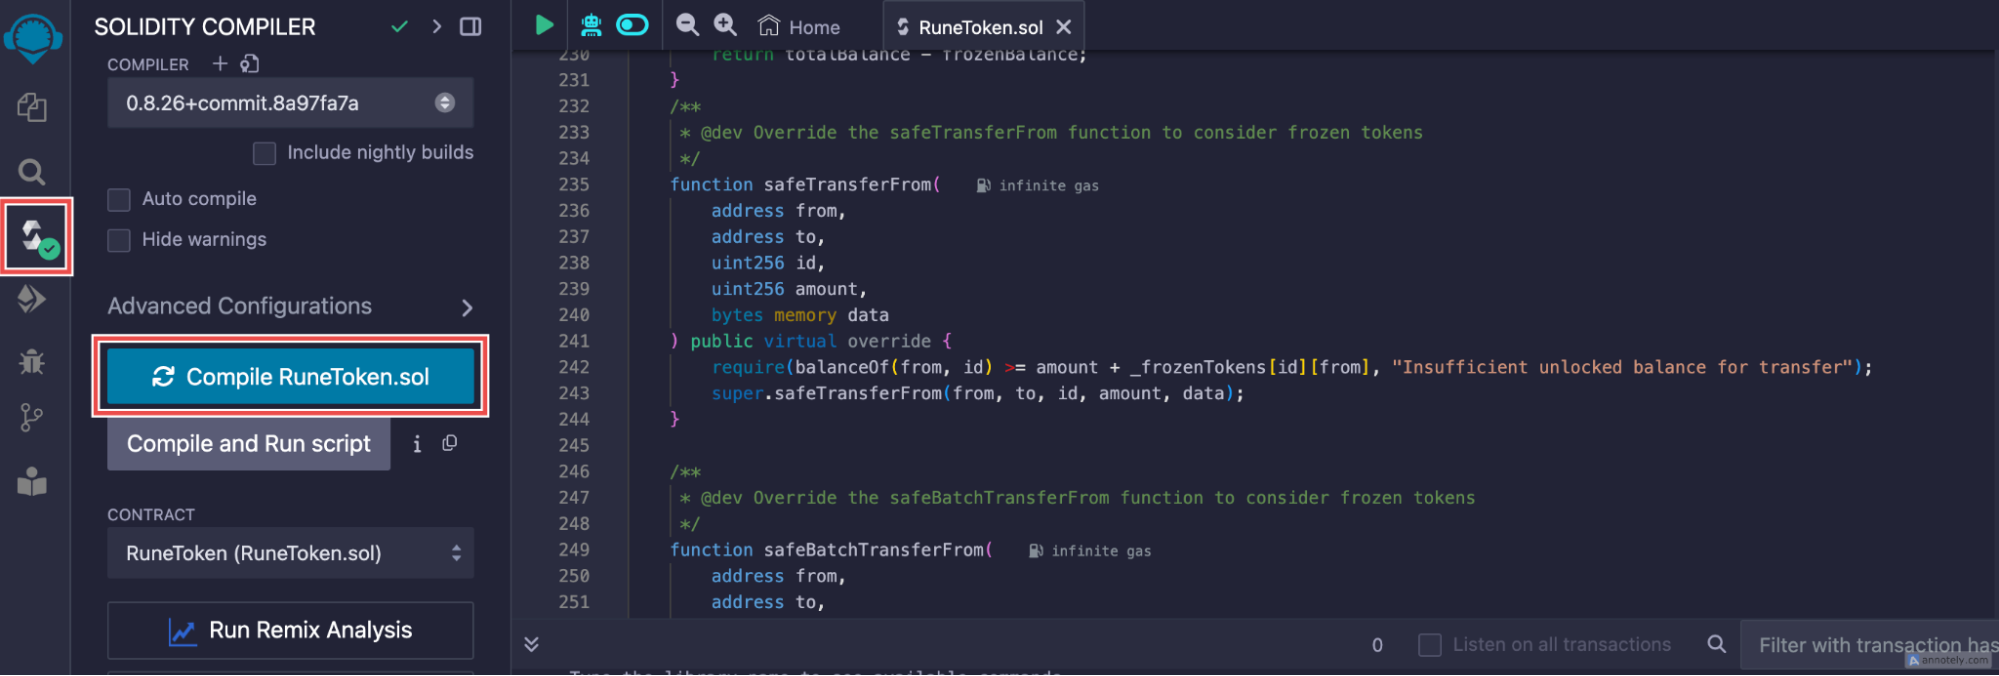
- Go to the Solidity Compiler tab (the third icon in the left sidebar).
- Make sure the compiler version matches
0.8.26. If not, select the correct version from the dropdown menu. - Click on the Compile RuneToken.sol button. A green check icon inside a circle will appear, indicating that the compilation was successful.
Step 5: Deploy the Smart Contract
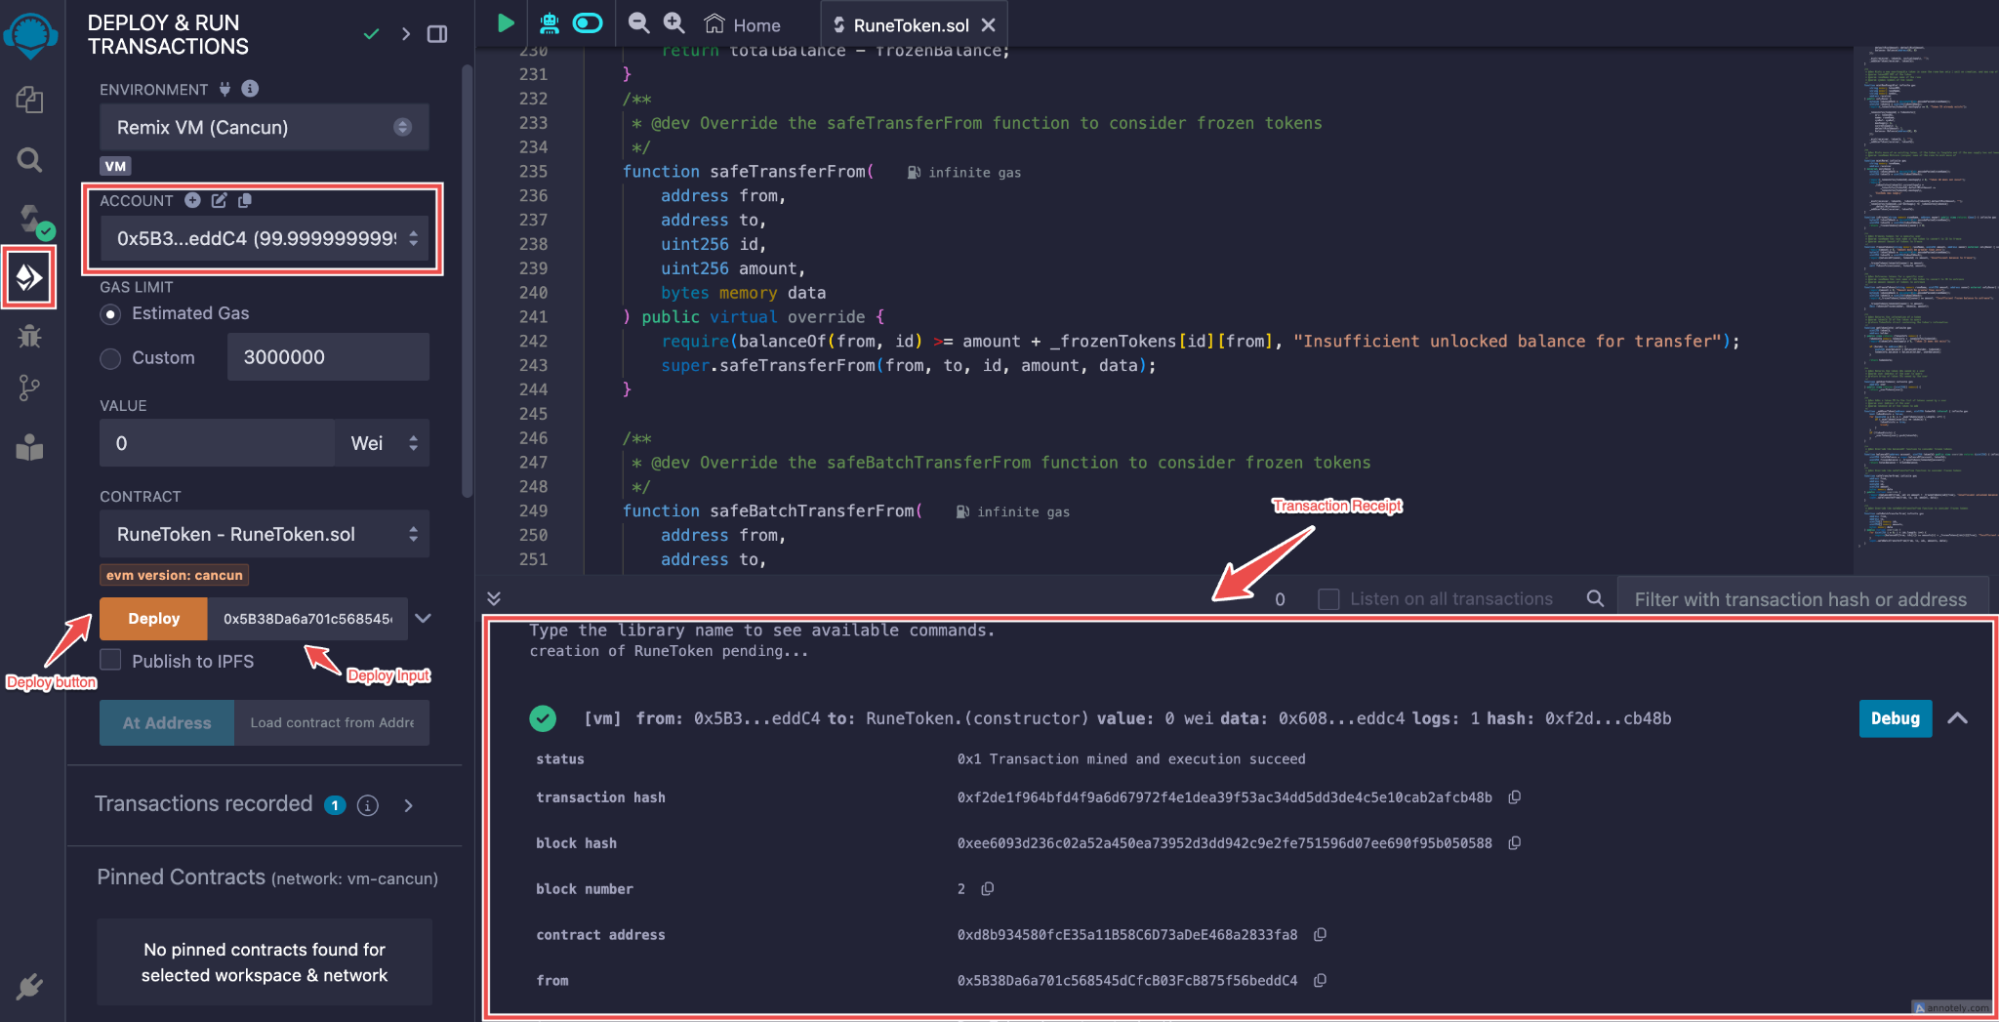
- Navigate to the Deploy & Run Transactions tab (the fourth icon in the left sidebar).
- Under Environment, select Remix VM
- In the Account dropdown, copy the first address by clicking the icon next to it.
- Paste the copied address into the Deploy input field.
- Click the Deploy button.
Step 6: Copy the Smart Contract Address
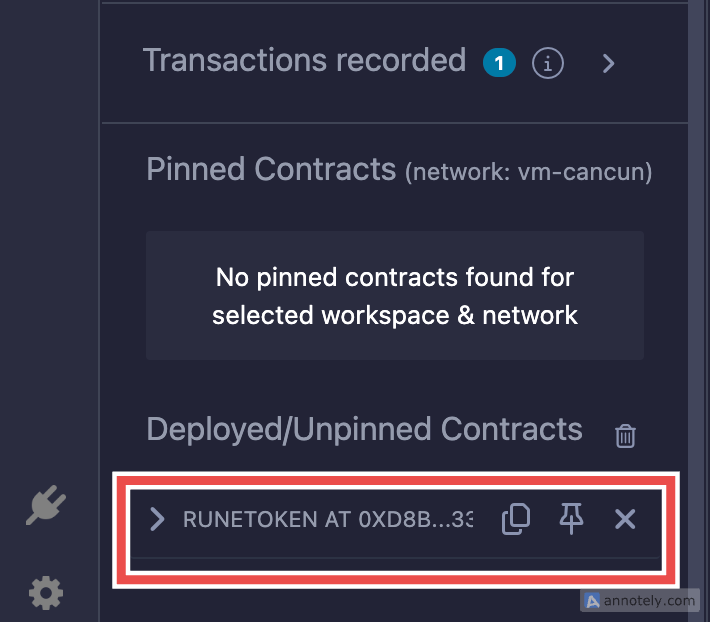
- After deployment, scroll down to see the Deployed Contracts section.
- You will find the generated smart contract address listed there. Copy this address for your records.
Alternative Method to Copy the Contract Address
- Alternatively, you can also copy the contract address from the Transaction Receipt that appears after deployment.
- Look for the contract address in the receipt and copy it as well.